|
|
|
GameSpot
See Also
User Services
Sponsored Sites  |
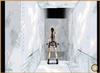
 Opera House …continued The Ornate Key, Act II Drop into the dressing room and pull the switch on the far wall to open the silver door. Get ready to slide for your life. The spinning fans will chew Lara to bits. Suffice it to say, if you haven't perfected your sliding jump yet, you won't make it through. The second Ornate Key is your reward for your first successful slide-jump. Work your way around this area to the fan ledges (you'll know them when you see them). Successfully negotiating the fan ledges means not jumping too far. In fact, a quick hop-jump (without grabbing) per ledge is all you really need to make a pain-free landing each time. If you want the second secret, now is the time.
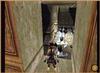
Once past the fan ledges, you'll find yourself in a small room containing a large box. Move the box away from the wall to gain access to a switch that opens the door. Then push and pull the box into the dressing room, such that it's below the middle window. Climb through the window, and go right. What do you know? Another box. Push and pull it such that you stack it on top of the first box. Now jump to the top of the boxes, get your guns ready, and take the corridor back up to the third balcony. Once on the third balcony, hang a right and run to the key lock past the second pillar. Jump through the now-open doorway just to your left, dodge the boulders, and make your way back to the top-level balcony of the Opera House. As you face the stage far below, turn left and fight your way down the far-left corridor. Stop when you get to the open panel in the right wall. Place the Relay Box in the wall panel, zip around the corner to your left and pull the switch to call the elevator. Draw your guns while you wait. It's death or a Circuit Board. Or the third secret…
Opera House, continued…
|
|||||||
| |

|