|
|
|
GameSpot
See Also
User Services
Sponsored Sites  |
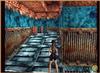
 Wreck of the Maria Doria …continued En Route to Circuit Breakers 2 and 3 Hang a right down the other corridor you revealed after you moved the green crates. You'll find the Restroom Key Lock in the area near the far-right corner. This key opens the set of glass doors to the left of the lock. Go into the alcove and hit the button. The French doors opposite the button you just pressed are now open. Go through those doors and hit the button therein to open the small door in the far center portion of wall in the ballroom (you shimmied past it en route to the first Circuit Breaker). Before you leave, return to the button that the Restroom Key revealed. Hit it to close the French doors. Getting the third Circuit Breaker requires these doors to be closed. But before we can get the third key, let's get number two. Once through the small door above the ballroom, follow the corridor. Open the hatch on the left wall if you want, opposite the Rusty Key Lock. However, stay in the corridor and dash to the hatch at the far end, in the right wall. Drop in. Note the knife switch high up on the far wall, near the left corner. Then check out the hatch high up in the center of the far wall. Turn right to lay eyes on the bright brown box. Hmmm. Pull and push it into the slot below the knife switch. After yanking the switch, turn right and pull the box out of the wall. Climb up and pull yourself into the corridor. The Rusty Key beckons. At the end of the corridors you'll drop into a large room with a lone box in the far-right corner - and a big switch in the far-left corner. Remember what we said about moving boxes in this mission? But this box promises more than access to a switch: Beneath it is the Rusty Key. Exit the room through the doorway you should have just opened, and hang a right - the Rusty Key Lock is just down the hall. Manipulate the boxes in the area accessed by the Rusty Key. It's worth noting that you need to push the last box deeper into the corridor to complete the puzzle. Follow the passageway to the obviously unstable floor plates. Stop when you get to the edge of these floor plates to trigger a rolling-barrels-of-death trap. After the barrels have passed, it's safe to dash over the floor plates. You can forge ahead to the next room and Circuit Breaker number two or enjoy a short side trip for the mission's second secret.
Wreck of the Maria Doria, continued…
|
|||||
| |

|